
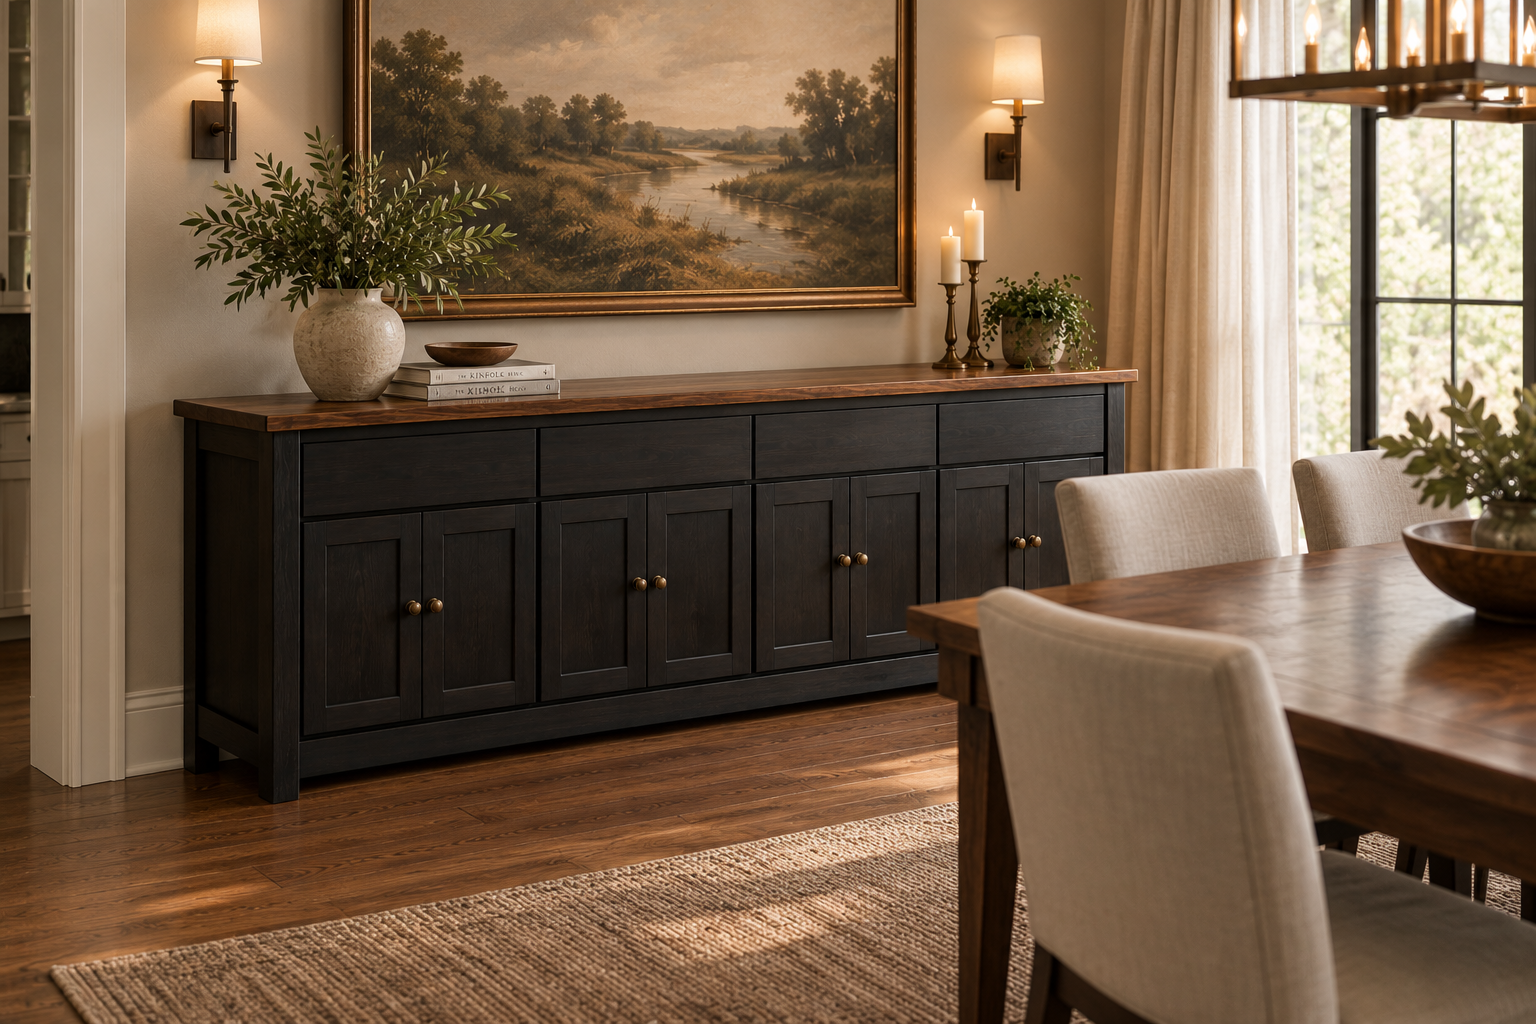

Every custom piece starts with a conversation. For this one, my client wanted something for her dining room that would work hard when she has people over for dinner: plenty of storage for dishes, and a generous surface for setting out food. She came to me with the idea, and after a day of designing, we landed on the piece you see in the rendering: a long, dark sideboard with four drawers across the top, eight doors below, and a warm walnut top to tie it all together.
A Little History of the Sideboard
The sideboard has been part of the dining room for centuries. In medieval Europe, the name was pretty literal: a simple board or table set along the side of the hall where food was laid out and served before it reached the main table. Over time that humble serving table grew into something more.
In 18th-century England, architect Robert Adam designed elegant sideboard tables flanked by pedestals and urns, and furniture makers like George Hepplewhite and Thomas Sheraton refined the idea into the form we’d recognize today: a single piece combining a serving surface with drawers for linens and silverware and cupboards for dishes and bottles. By the Victorian era, sideboards had become grand, heavily carved showpieces, a sign of a well-kept home. In the 20th century, mid-century designers stripped them back to low, clean-lined credenzas.
You’ll hear a few names for the same idea. “Buffet” comes from the French, and “credenza” from the Italian, where it’s said to trace back to the custom of tasting food on a side table before serving it to make sure it was safe. Whatever you call it, the purpose hasn’t changed much in 500 years: a place to store what you need for a meal and a surface to serve it from. That’s exactly what my client was after, and it’s what this piece is built to do.
Starting with the carcass
The first step in any cabinet build is the carcass, the main box that everything else depends on. I cut the panels to size and make the joinery, then move into assembly. This is when the piece starts to take shape and you can finally see the scale of it standing in the shop. Once the box is together, I edge band all the exposed edges so they’re clean and durable, then stain and finish the carcass.
Drawers and doors
Next I turn to the drawers and doors, and honestly, this is one of my favorite parts of the build. Up until now it’s been a big box on the bench. Once the drawers and doors start going in, it stops looking like parts and starts looking like a real piece of furniture.
Where things stand
Right now I’m fitting the doors, which takes patience. Every gap and reveal needs to be even so the whole front reads as one clean piece. Soon I’ll start on the walnut top, which is where this sideboard really comes to life. Check back for the next update, and if you’re dreaming up a piece for your own home, I’d love to hear about it.
Anderson Woodwork · (360) 259-0232 · andersonwoodwork.net


Discover more from Anderson woodworks custom furniture & cabinets
Subscribe to get the latest posts sent to your email.

Leave a Reply